

So, you’ve opened up your kitchen cabinets and bam! That not-so-pleasant smell hits you. It’s like a mystery you didn’t ask for. Don’t worry, though. Dealing with lingering odors from kitchen cabinets is a common problem, but thankfully, there are plenty of ways to tackle it. Whether it’s a faint mustiness or a more stubborn funk, we’ll walk through some straightforward methods for Removing Odors from Kitchen Cabinets so you can get back to enjoying your kitchen.
Table of Contents
Key Takeaways
- Start by completely emptying your cabinets to find the source of the smell and allow for thorough cleaning.
- Natural cleaners like vinegar, baking soda, and lemon juice are effective at breaking down odor-causing bacteria and residues.
- Odor absorbers such as baking soda, activated charcoal, or even coffee grounds can be placed inside cabinets to soak up remaining smells.
- Good ventilation, like opening doors and using fans, is important for drying out cabinets and dissipating odors.
- Prevent future smells by regularly wiping down surfaces, keeping cabinets organized, and using natural deodorizers.
Initial Steps for Removing Odors from Kitchen Cabinets
Alright, so you’ve noticed a less-than-pleasant smell wafting from your kitchen cabinets. Before you start scrubbing with every cleaner under the sun, let’s take a breath and go through the basics. Getting rid of those stubborn odors starts with a good, honest look at what’s going on inside.
Empty and Inspect Your Cabinets
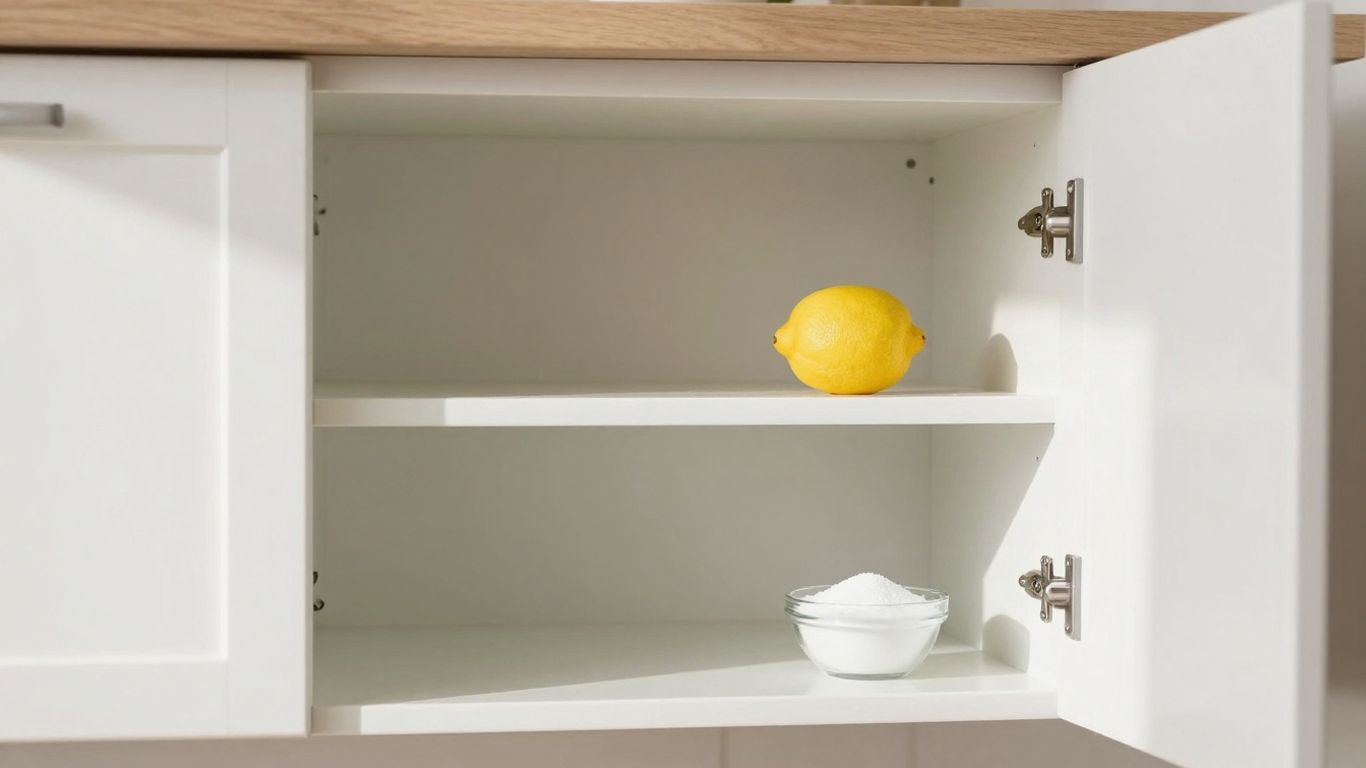
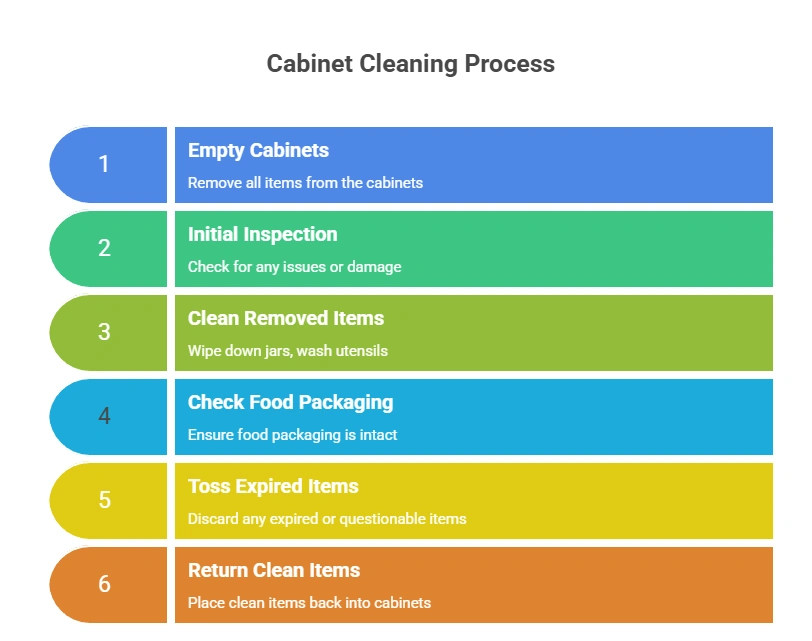
The very first thing you need to do is take everything out. I mean it – every dish, every spice jar, every random gadget you forgot you owned. This isn’t just about making space; it’s about seeing the full picture. As you empty, give each item a quick sniff. Sometimes, the culprit isn’t the cabinet itself, but a forgotten jar of something that’s gone bad or a leaky container. Also, keep an eye out for any spills or sticky residue that might have dried onto the shelves or walls. These are prime spots for odor-causing bacteria to hang out.
Identify the Source of the Smell
Once the cabinets are completely bare, it’s time for some detective work. Get down there and really sniff around. Does the smell seem stronger in one particular cabinet or corner? Look closely for any signs of mold or mildew, especially in damp areas or where spills might have occurred. Sometimes, a musty smell is a sign of moisture trapped behind the cabinet walls, which could indicate a bigger issue like a leak. If you see anything suspicious, like dark spots or fuzzy growth, that’s likely your main problem area. Pinpointing the source is half the battle.
Clear Out All Contents
This step is really about being thorough. After you’ve emptied the cabinets and done your initial inspection, take a moment to clean the items you removed. Wipe down jars, wash utensils, and check food packaging. If anything is expired or questionable, toss it. You don’t want to put a perfectly good item back into a clean cabinet only for it to pick up the lingering smell from something else. Think of it as a mini-declutter and clean of everything that calls your cabinets home.
Natural Cleaning Solutions for Cabinet Odors
Sometimes, those stubborn smells in your kitchen cabinets aren’t going to budge with just a quick wipe-down. That’s where natural cleaning solutions come in handy. They’re effective, usually readily available in your pantry, and a lot gentler than harsh chemicals. These methods focus on breaking down odor-causing bacteria and absorbing lingering smells.
Vinegar and Water Mixture
This is a classic for a reason. Vinegar, especially white vinegar, is acidic enough to kill many types of bacteria and mold that can cause odors. Plus, its own strong smell dissipates quickly, taking the bad odors with it.
- What you’ll need: Equal parts white vinegar and water.
- How to use it: Mix them in a spray bottle. Lightly spray the inside of your cabinets, focusing on any spots that seem particularly smelly or sticky. Wipe down with a clean cloth. You might want to open the cabinet doors afterward to let the vinegar smell air out.
Baking Soda Paste for Tough Spots
For those really persistent smells or sticky residue, baking soda is your best friend. It’s a fantastic natural deodorizer and a mild abrasive that can help lift grime.
- How to make it: Mix baking soda with a little bit of water until you get a thick paste. It should be spreadable but not too runny.
- Application: Apply this paste directly to the offending spots. Let it sit for about 15-20 minutes. Then, wipe it away with a damp cloth. Rinse the cloth and wipe again to make sure all the baking soda residue is gone.
Lemon Juice and Vinegar Combination
Want to double up on the natural cleaning power? Combining lemon juice and vinegar creates a potent, yet non-toxic, odor-fighting duo. The acidity in both works hard, and the lemon adds a pleasant, fresh scent.
- The mix: You can use a similar ratio to the vinegar and water, but add a good squeeze of fresh lemon juice to the spray bottle. Some people even use a bit more lemon juice for extra scent power.
- Why it works: The acids in both lemon juice and vinegar help break down odor-causing bacteria and mold. The lemon scent also helps to mask any residual unpleasant smells, leaving your cabinets smelling much fresher.
When using these natural cleaners, always remember to test a small, inconspicuous area first. This is especially important if your cabinets are made of a delicate wood or have a special finish. You want to make sure the solution won’t damage or discolor the surface before you go all-in.
Effective Odor Absorbers for Kitchen Cabinets
Sometimes, cleaning alone isn’t enough to banish those lingering kitchen cabinet smells. That’s where odor absorbers come in handy. These aren’t magic potions, but simple substances that work by trapping odor molecules, kind of like a sponge for smells. Using the right absorbers can make a big difference in getting your cabinets truly fresh.
Utilizing Baking Soda
Baking soda is a classic for a reason. It’s cheap, readily available, and surprisingly good at neutralizing odors. Just open a fresh box and place it in the back of your cabinets. For tougher spots or a more concentrated effect, you can make a paste with a little water, apply it to a stubborn area, let it sit for a bit, and then wipe it clean. Remember to replace the box every month or so, as it loses its effectiveness over time.
Activated Charcoal Bags
Activated charcoal is another fantastic option. You might have seen these little bags in shoes or gym bags – they work the same way in your cabinets. The porous nature of charcoal traps odor particles. You can buy them specifically for home use, and many are reusable; just pop them in the sun for a few hours to ‘recharge’ them. They’re a bit more of a long-term solution than baking soda.
Coffee Grounds and Beans
Don’t toss those used coffee grounds just yet! Once dried, they can work wonders as an odor absorber. Spread them on a tray or in a shallow bowl and place them inside your cabinets. The strong coffee scent can overpower and absorb other unpleasant smells. You can also use dry, whole coffee beans for a similar effect, though they might not be quite as potent as the grounds. This is a great way to repurpose something you’d otherwise throw away, and it’s a good example of natural odor neutralizers.
When using any odor absorber, remember that ventilation is key. Make sure your cabinets are as dry as possible before placing absorbers inside. Leaving the doors open for a while first will help immensely.
Here’s a quick rundown of how to use these absorbers:
- Baking Soda: Place an open box or bowl inside. Replace monthly.
- Activated Charcoal: Use pre-made bags. Recharge in sunlight periodically.
- Coffee Grounds/Beans: Spread dried grounds or beans on a tray. Replace as needed.
These methods are simple, effective, and won’t break the bank. They’re a great addition to your cleaning routine for keeping those cabinets smelling fresh.
Airing Out and Ventilation Techniques
Sometimes, the best way to get rid of a lingering smell is just to let the fresh air do its thing. After you’ve done your initial cleaning, giving your cabinets some breathing room is a really important step. It helps to clear out any residual cleaning product smells and, more importantly, any of those stubborn odors that just won’t quit.
Maximize Airflow with Open Doors
This is pretty straightforward. Once everything is clean and dry, just leave those cabinet doors wide open. Seriously, don’t be shy about it. The more open they are, the better the air can circulate inside. If you’ve got a busy kitchen, you might need to plan this for a time when you’re not actively cooking or using the space heavily. Leaving them open overnight can make a big difference, especially if the smell is particularly strong. It allows any trapped moisture and odor particles to escape.
Using Fans for Faster Drying
If you’re in a hurry or the air feels a bit damp, a fan can be your best friend. Placing a regular household fan in front of the open cabinets can really speed things up. It creates a constant flow of air, pushing out the stale air and bringing in fresh air. This is especially helpful if you live in a humid climate or if your cabinets are in a part of the kitchen that doesn’t get much natural airflow. You can even use ceiling fans if you have them to help move the air around the whole kitchen. For better air circulation and purification, consider placing an air purifier near ventilation sources like your range hood [0039].
Importance of Moisture Control
Moisture is a major culprit when it comes to cabinet odors. It creates a damp environment where mold and mildew can thrive, and those guys are the source of some seriously unpleasant smells. So, while you’re airing things out, keep an eye on humidity levels. If your kitchen tends to be damp, consider using a small dehumidifier or moisture-absorbing packets inside the cabinets. This isn’t just about getting rid of current smells; it’s about preventing them from coming back.
Proper ventilation isn’t just about making things smell better in the short term; it’s a key part of keeping your kitchen cabinets fresh and healthy in the long run. Don’t skip this step!
Here’s a quick rundown of what to do:
- Open all cabinet doors and drawers. Give everything access to the air.
- Position fans to direct airflow into the cabinets.
- Monitor humidity levels and use moisture absorbers if needed.
- Leave doors open for at least several hours, or even overnight if possible.
Advanced Methods for Stubborn Smells

Sometimes, the usual tricks just don’t cut it. If your kitchen cabinets are still holding onto a stubborn odor after trying the basic cleaning and deodorizing methods, it’s time to bring out the heavy hitters. These techniques are a bit more involved but can tackle those persistent smells that just won’t quit.
Hydrogen Peroxide for Mold and Bacteria
If you suspect mold or mildew is the culprit, hydrogen peroxide is a fantastic option. It’s a powerful disinfectant that breaks down into water and oxygen, leaving no harsh chemical residue behind. It’s great for killing off mold and bacteria that cause those musty smells. Just spray undiluted 3% hydrogen peroxide directly onto any affected areas, let it sit for about 10-15 minutes to work its magic, and then wipe it clean. Always test this on a small, inconspicuous spot first to make sure it doesn’t discolor your cabinet finish.
Bleach or Vodka Solutions
For really tough odors, especially those caused by spills that have seeped into the wood or finish, a diluted bleach solution or even plain vodka can be effective. For bleach, mix one part bleach with ten parts water. Apply sparingly with a cloth, focusing on the smelly spots, and rinse thoroughly. Be cautious with bleach, as it can damage certain finishes and requires good ventilation. Vodka, on the other hand, is a less harsh alternative. Its alcohol content can help neutralize odors. You can spray undiluted vodka inside the cabinets and let it air dry. The alcohol smell dissipates quickly, taking the bad odors with it.
Sanding Wood Surfaces
If the odor has deeply penetrated unfinished or damaged wood, sanding might be your last resort. This is a more aggressive approach, best suited for solid wood cabinets. You’ll need to remove all contents, empty the cabinet, and then lightly sand the interior surfaces. This process removes the top layer of wood where the odor molecules might be trapped. After sanding, wipe away all dust thoroughly and then proceed with sealing or refinishing the wood to prevent future odor absorption. This method requires careful work and is usually followed by applying a sealant or fresh paint to lock in the clean surface.
When dealing with stubborn smells, remember that patience is key. Some odors have a way of hiding in the smallest crevices or have deeply penetrated materials. Don’t be discouraged if the first attempt doesn’t completely eliminate the smell. You might need to repeat a process or combine methods for the best results.
Preventing Future Odors in Kitchen Cabinets
Keeping your kitchen cabinets smelling fresh long-term is all about a few simple habits. It’s not a one-time fix, but more of an ongoing thing. Think of it like keeping your car running smoothly – a little regular attention goes a long way.
Regular Cabinet Wipe-Downs
This is probably the most straightforward step. Don’t wait until you notice a smell. Make it a habit to give your cabinets a quick wipe-down at least once a week. You don’t need anything fancy, just a damp cloth with a bit of mild soap or a gentle all-purpose cleaner. Pay special attention to the corners and edges where crumbs and spills like to hide. If you spill something sticky, clean it up right away. Seriously, a quick wipe now saves you a lot of trouble later.
Maintain Cabinet Organization
An organized cabinet isn’t just pretty to look at; it actually helps prevent smells. When things are crammed in there, it’s harder for air to circulate, and little spills or residues can get trapped. Try to sort through your stuff regularly. Use clear containers so you can see what you have. This also makes it easier to spot expired items or anything that might be starting to go bad. Get rid of things you don’t use anymore. Less clutter means fewer places for odors to hide.
Incorporate Natural Deodorizers Regularly
This is a super easy way to keep things smelling neutral. You can use things like an open box of baking soda or a small bowl of activated charcoal. Just pop one in the back of your cabinets. They work by absorbing smells that might be lingering. You’ll want to swap them out every month or so to keep them working their best. Some people even like to use coffee grounds in a small dish, though that adds its own scent, which might not be for everyone.
Keeping cabinets clean and odor-free is a continuous process. Small, consistent efforts are far more effective than occasional deep cleans. Think about how you maintain other areas of your home – the kitchen cabinets deserve that same level of care.
Here’s a quick look at what to do:
- Wipe down: A quick weekly clean with mild soap and water.
- Organize: Declutter and use containers to keep things tidy.
- Deodorize: Use baking soda or charcoal to absorb lingering smells.
- Check expiration dates: Regularly toss out old or expired items.
By doing these things, you’re setting yourself up for cabinets that smell fresh, not funky.
Common Mistakes to Avoid When Removing Odors
Sometimes, even with the best intentions, we can make odor removal harder than it needs to be. Let’s talk about a few common slip-ups that might be holding you back from that fresh cabinet smell.
Overlooking Hidden Areas
It’s easy to focus on the big, open shelves when you’re cleaning. You wipe down the front doors, maybe the visible back panels. But what about those tight corners, the undersides of shelves, or the very back where things get pushed? These spots are prime real estate for trapped moisture and lingering smells. Don’t just skim the surface; really get into those nooks and crannies. Think about moving everything out, even if it feels like a lot, to give yourself a clear view and access to every inch.
Improper Product Usage
Grabbing the strongest cleaner you have might seem like the quickest fix, but it can actually cause more problems. Using too much of a product, or a cleaner that’s too harsh for your cabinet material, can lead to discoloration, damage to the finish, or even leave behind its own chemical smell. Always read the labels, and if you’re unsure, test any cleaner on a small, inconspicuous spot first. Sometimes, a simple solution of water and a little dish soap is all you need. For tougher jobs, stick to the recommended amounts and rinse thoroughly.
Skipping Decluttering Before Cleaning
Trying to clean a cluttered cabinet is like trying to mop a floor covered in toys – it’s just not effective. When cabinets are packed full, it’s hard to see what you’re dealing with, and cleaning solutions can’t reach all the surfaces. Before you even think about spraying or wiping, take everything out. This is your chance to toss expired items, wipe down individual containers, and get a real sense of what’s going on in there. A good declutter makes the actual cleaning process so much smoother and more thorough. It’s a step that really pays off.
Wrapping Up Your Odor-Free Kitchen Journey
So, there you have it. Getting rid of those lingering kitchen cabinet smells doesn’t have to be a huge headache. We’ve gone over a bunch of ways to tackle the problem, from simple natural remedies like vinegar and baking soda to making sure you’re airing things out properly. Remember, a little regular cleaning goes a long way in preventing smells from coming back in the first place. Keep up with those quick wipe-downs and maybe toss in a natural odor absorber now and then, and your kitchen cabinets should stay smelling fresh and clean. Happy cooking!
Read Also: How To Clean Coffee Maker Thoroughly For The Best Brew
FAQ
What’s the first thing I should do if my kitchen cabinets smell bad?
Before you try to clean anything, it’s super important to take everything out of the cabinets. This way, you can really see what’s going on inside and make sure the smell isn’t just from old food or something spilled. Check for anything expired or yucky.
Are natural cleaners really good enough to get rid of tough smells?
Yes, they often are! Things like vinegar and baking soda are great at soaking up smells and cleaning without harsh chemicals. A mix of vinegar and water can clean surfaces, and a baking soda paste works wonders on sticky spots. Lemon juice can also help freshen things up.
How can I make sure the smell doesn’t come back?
To keep smells away, try to wipe down your cabinets regularly, maybe once a week. Keeping things tidy inside and not letting them get too crowded helps too. You can also put things like an open box of baking soda or charcoal bags inside to keep absorbing any sneaky smells.
What if I can still smell something after cleaning?
If a smell is really stubborn, you might need to try something a bit stronger. Some people use a mixture of hydrogen peroxide to kill mold and bacteria, or even a diluted bleach or vodka solution. For wood cabinets, sometimes lightly sanding the surface can help it ‘breathe’ and get rid of smells.
Is it okay to mix different cleaning products together?
Definitely not! You should never mix cleaning products like vinegar with bleach, as this can create dangerous fumes. It’s always best to stick to one cleaning solution at a time or use simple, natural combinations like vinegar and water.
How important is air flow for getting rid of cabinet smells?
Air flow is really important! Leaving cabinet doors open for a while, especially after cleaning, helps everything dry out completely and lets fresh air get rid of lingering odors. Using a fan can speed this up even more and helps prevent moisture, which can cause smells.